Autocharge
Autocharge is an alternative to using an NFC tag or starting from the app. Autocharge lets your charger recognise your car automatically. Once it is set up, you just plug in — no RFID tag and no app tap needed — and charging starts on its own. This works on chargers that have access control enabled, where a session would otherwise need to be authorized.
Note
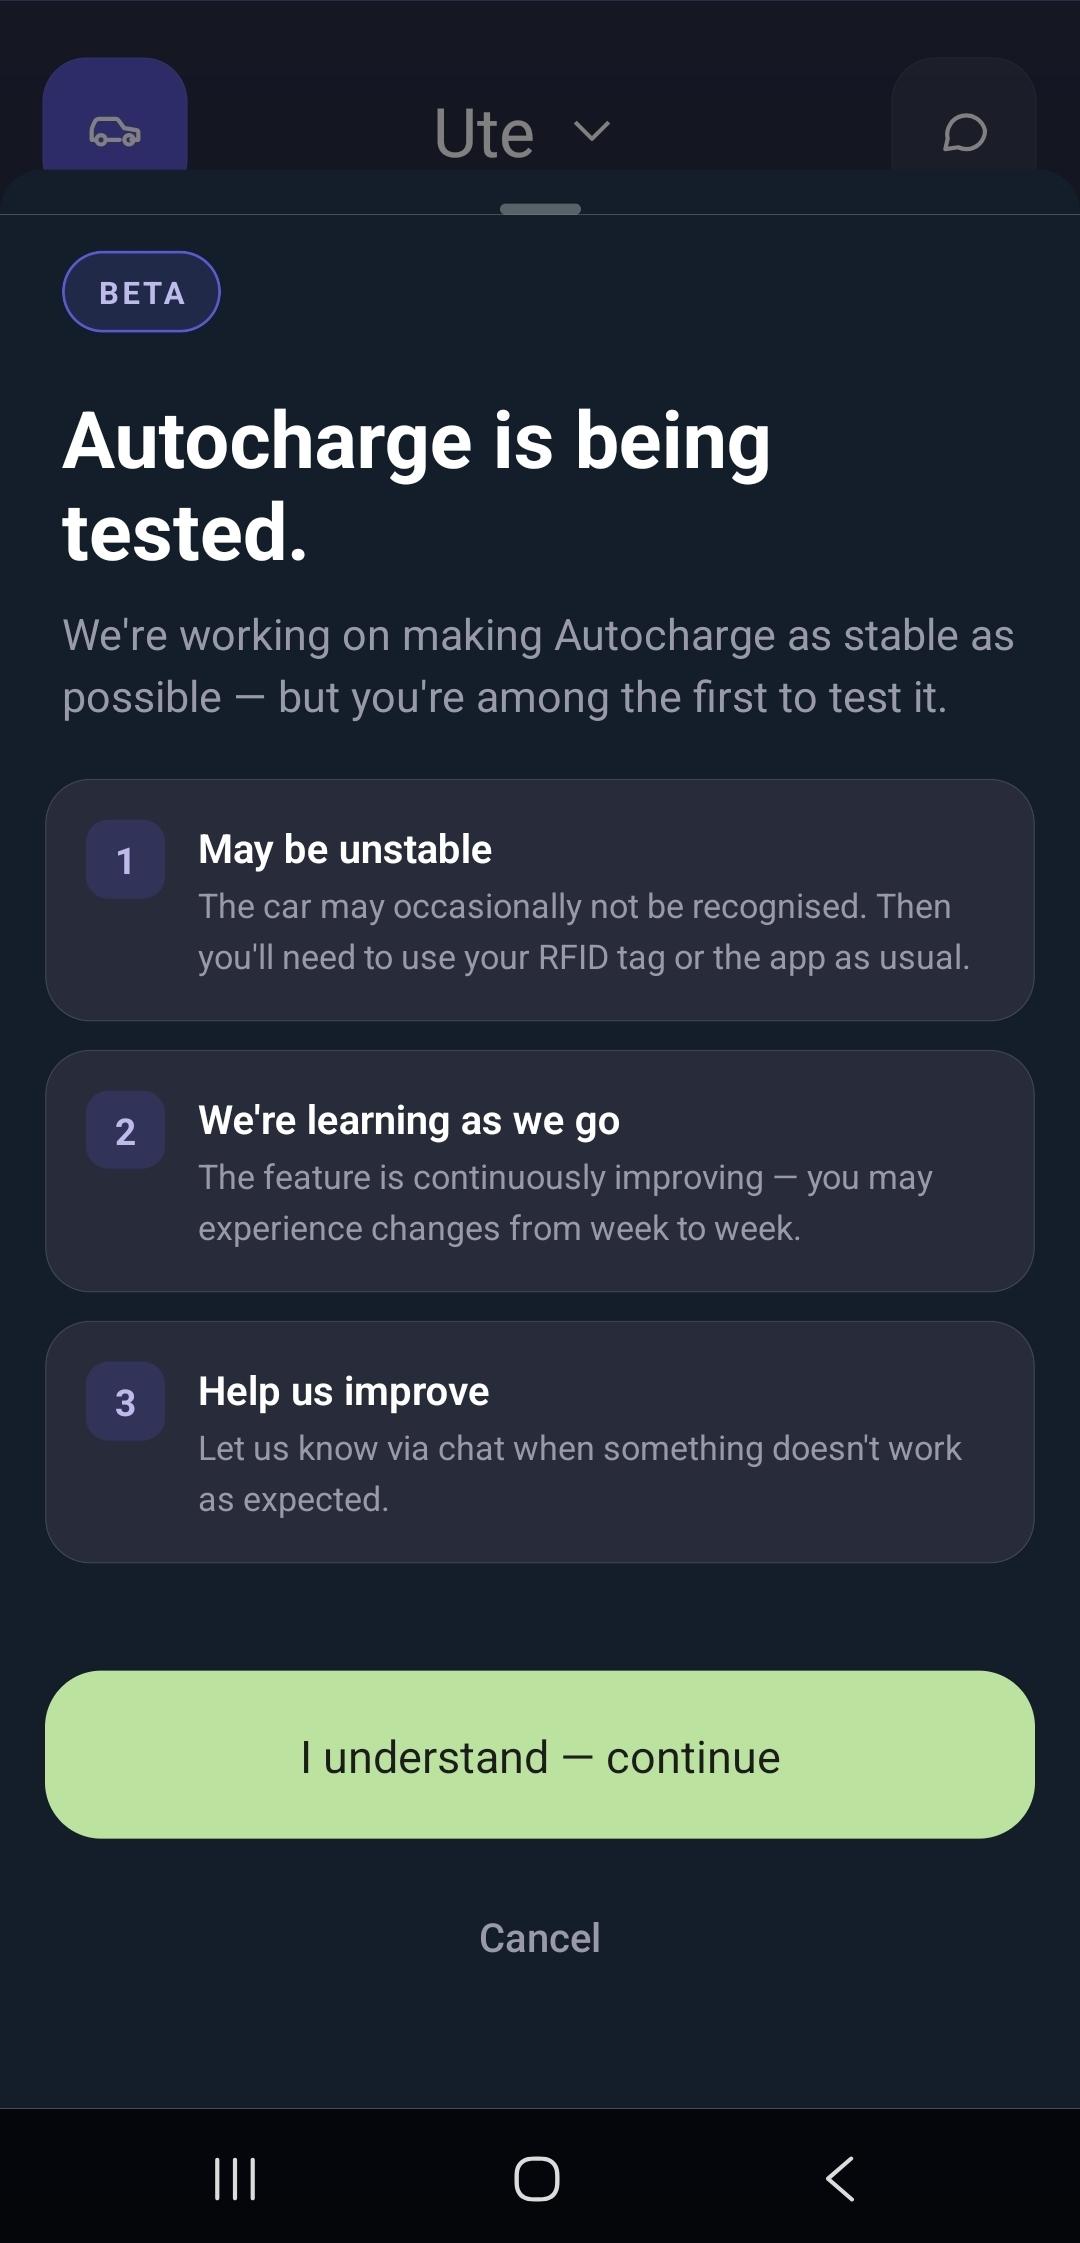
Autocharge is currently in beta. The car is recognised reliably most of the time, but it may occasionally not be detected — in that case, authorize the session as usual with your RFID tag or the Enua app. The feature improves continuously, so behaviour can change from week to week. If something doesn't work as expected, let us know through the in-app chat.
This guide covers three things:
- Enable Autocharge on your charger.
- Register your vehicle.
- Start charging automatically.
1. Enable Autocharge
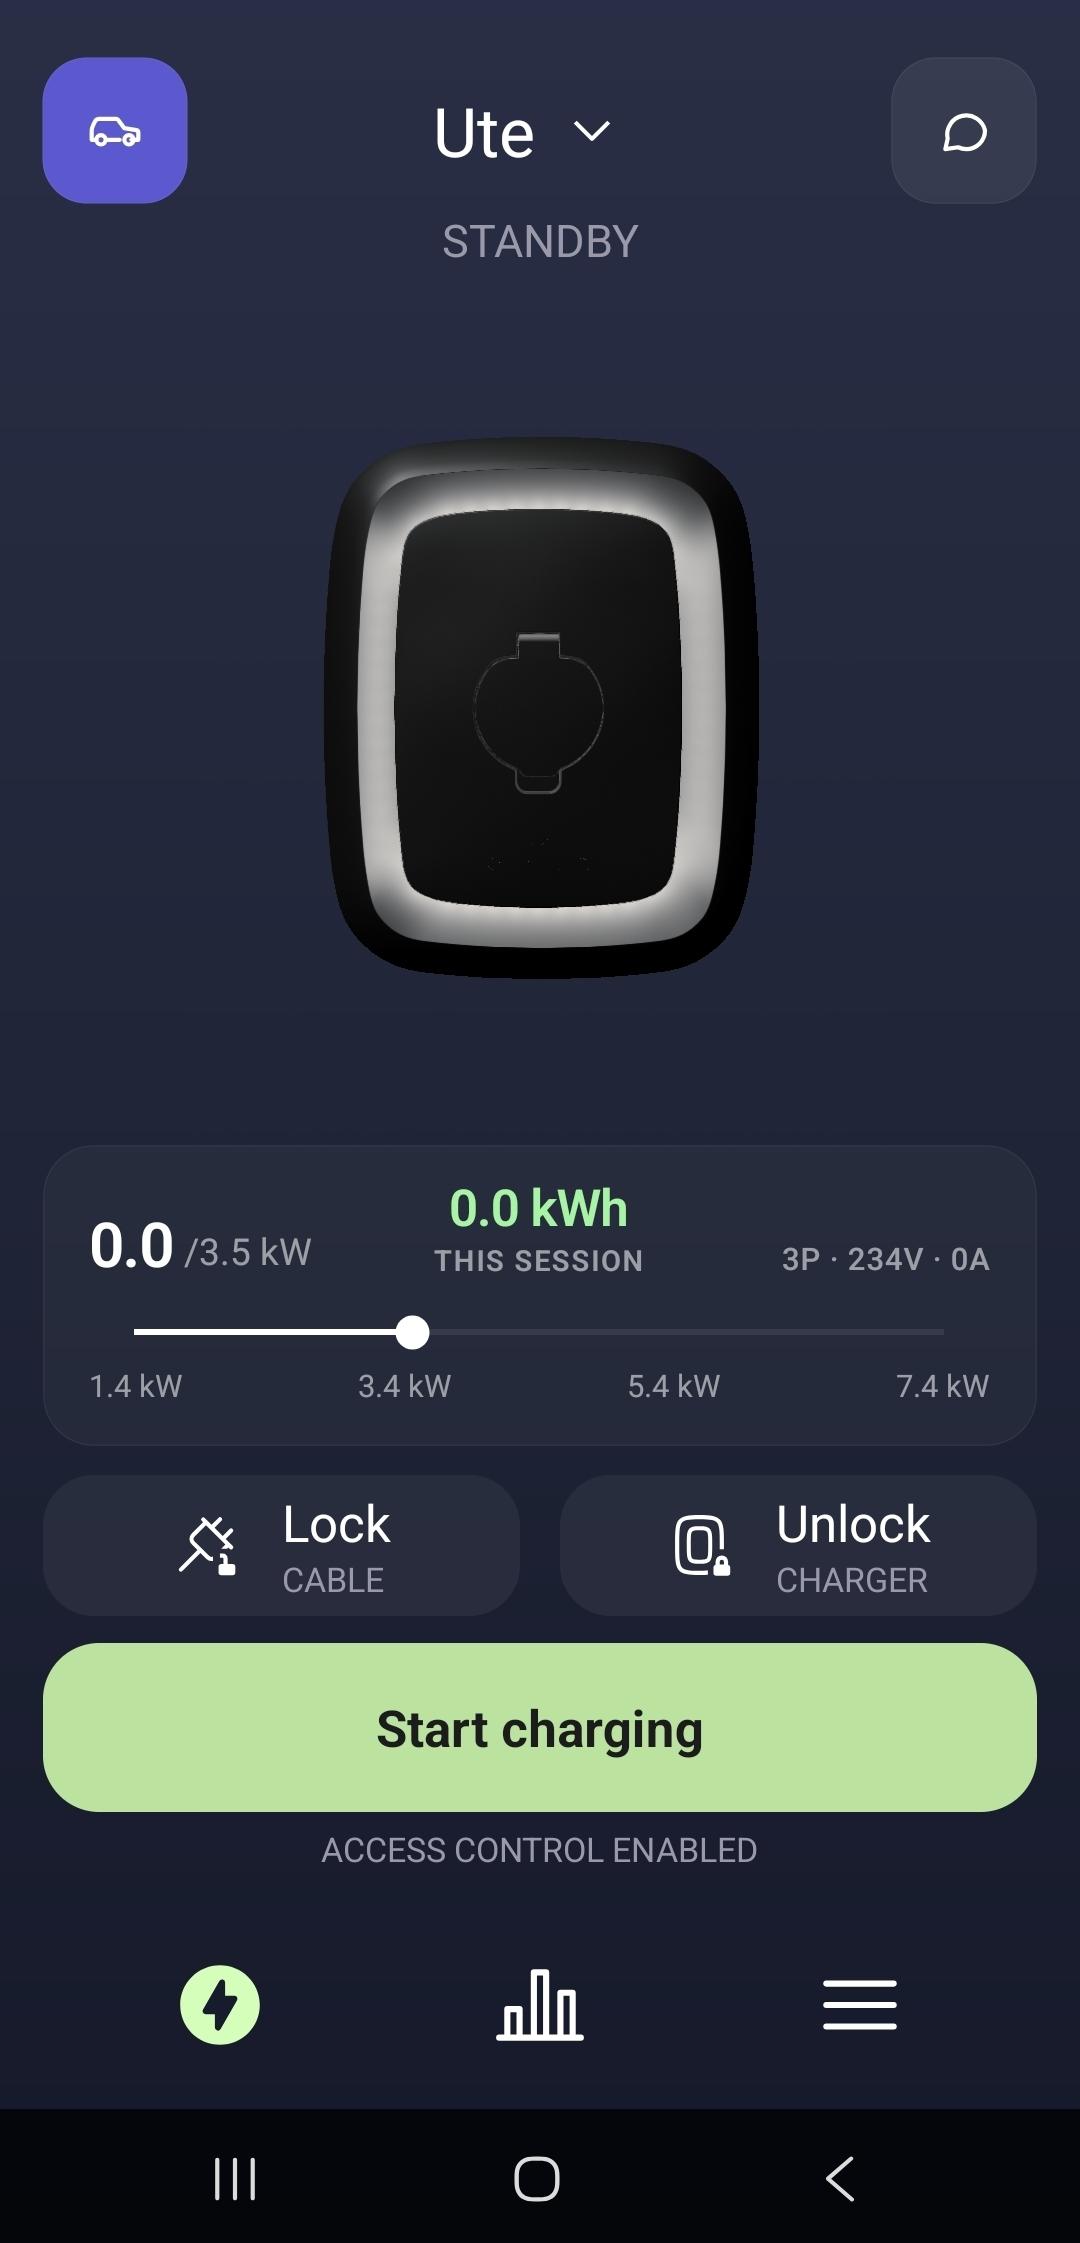
On the charger's home screen, open Autocharge with the car icon in the top-left corner.
The first time you open it, a short note explains that Autocharge is in beta. Read it and tap I understand — continue.
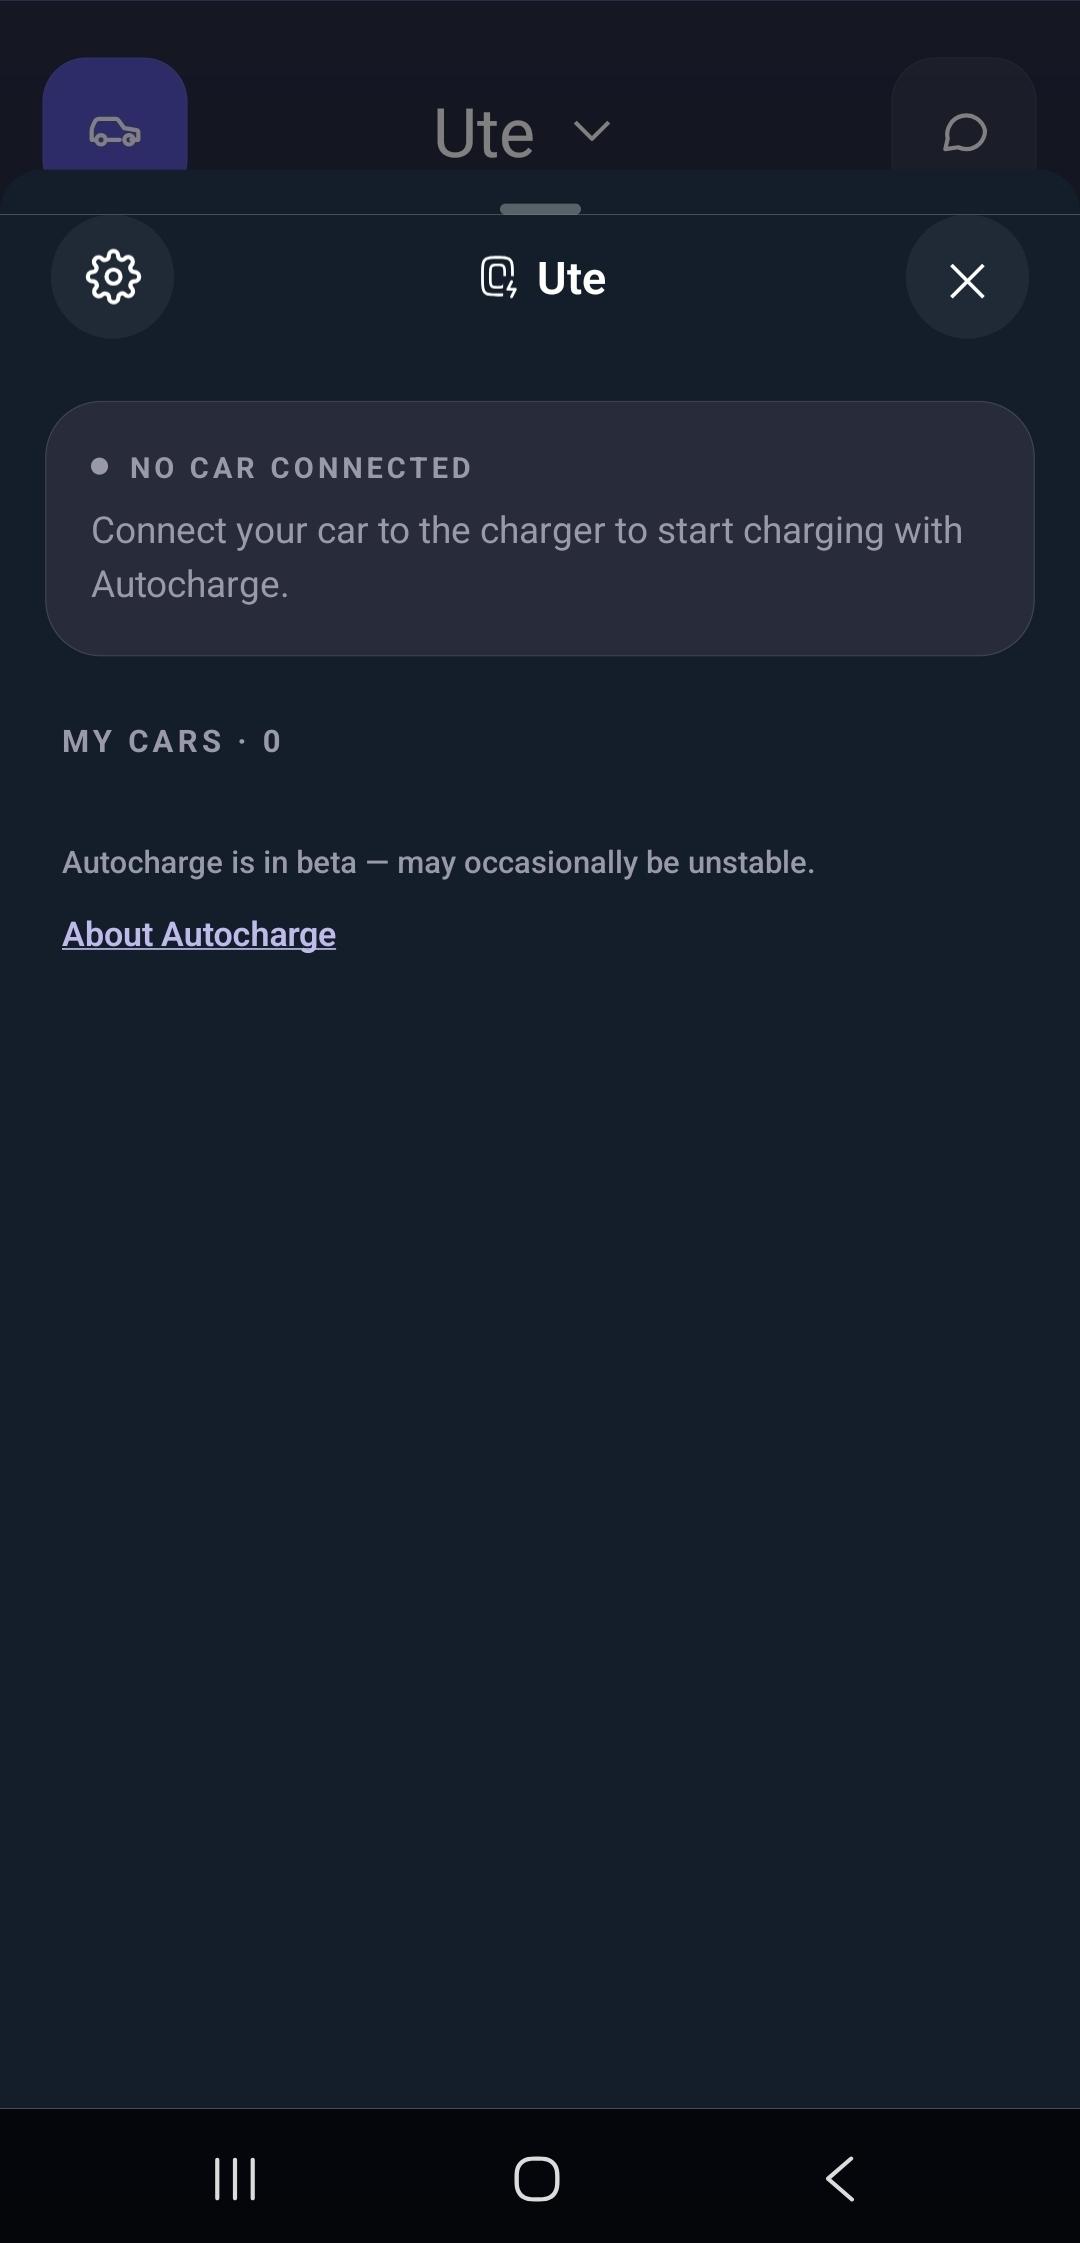
This opens the Autocharge panel. Before a car is registered it shows No car connected and My cars · 0.
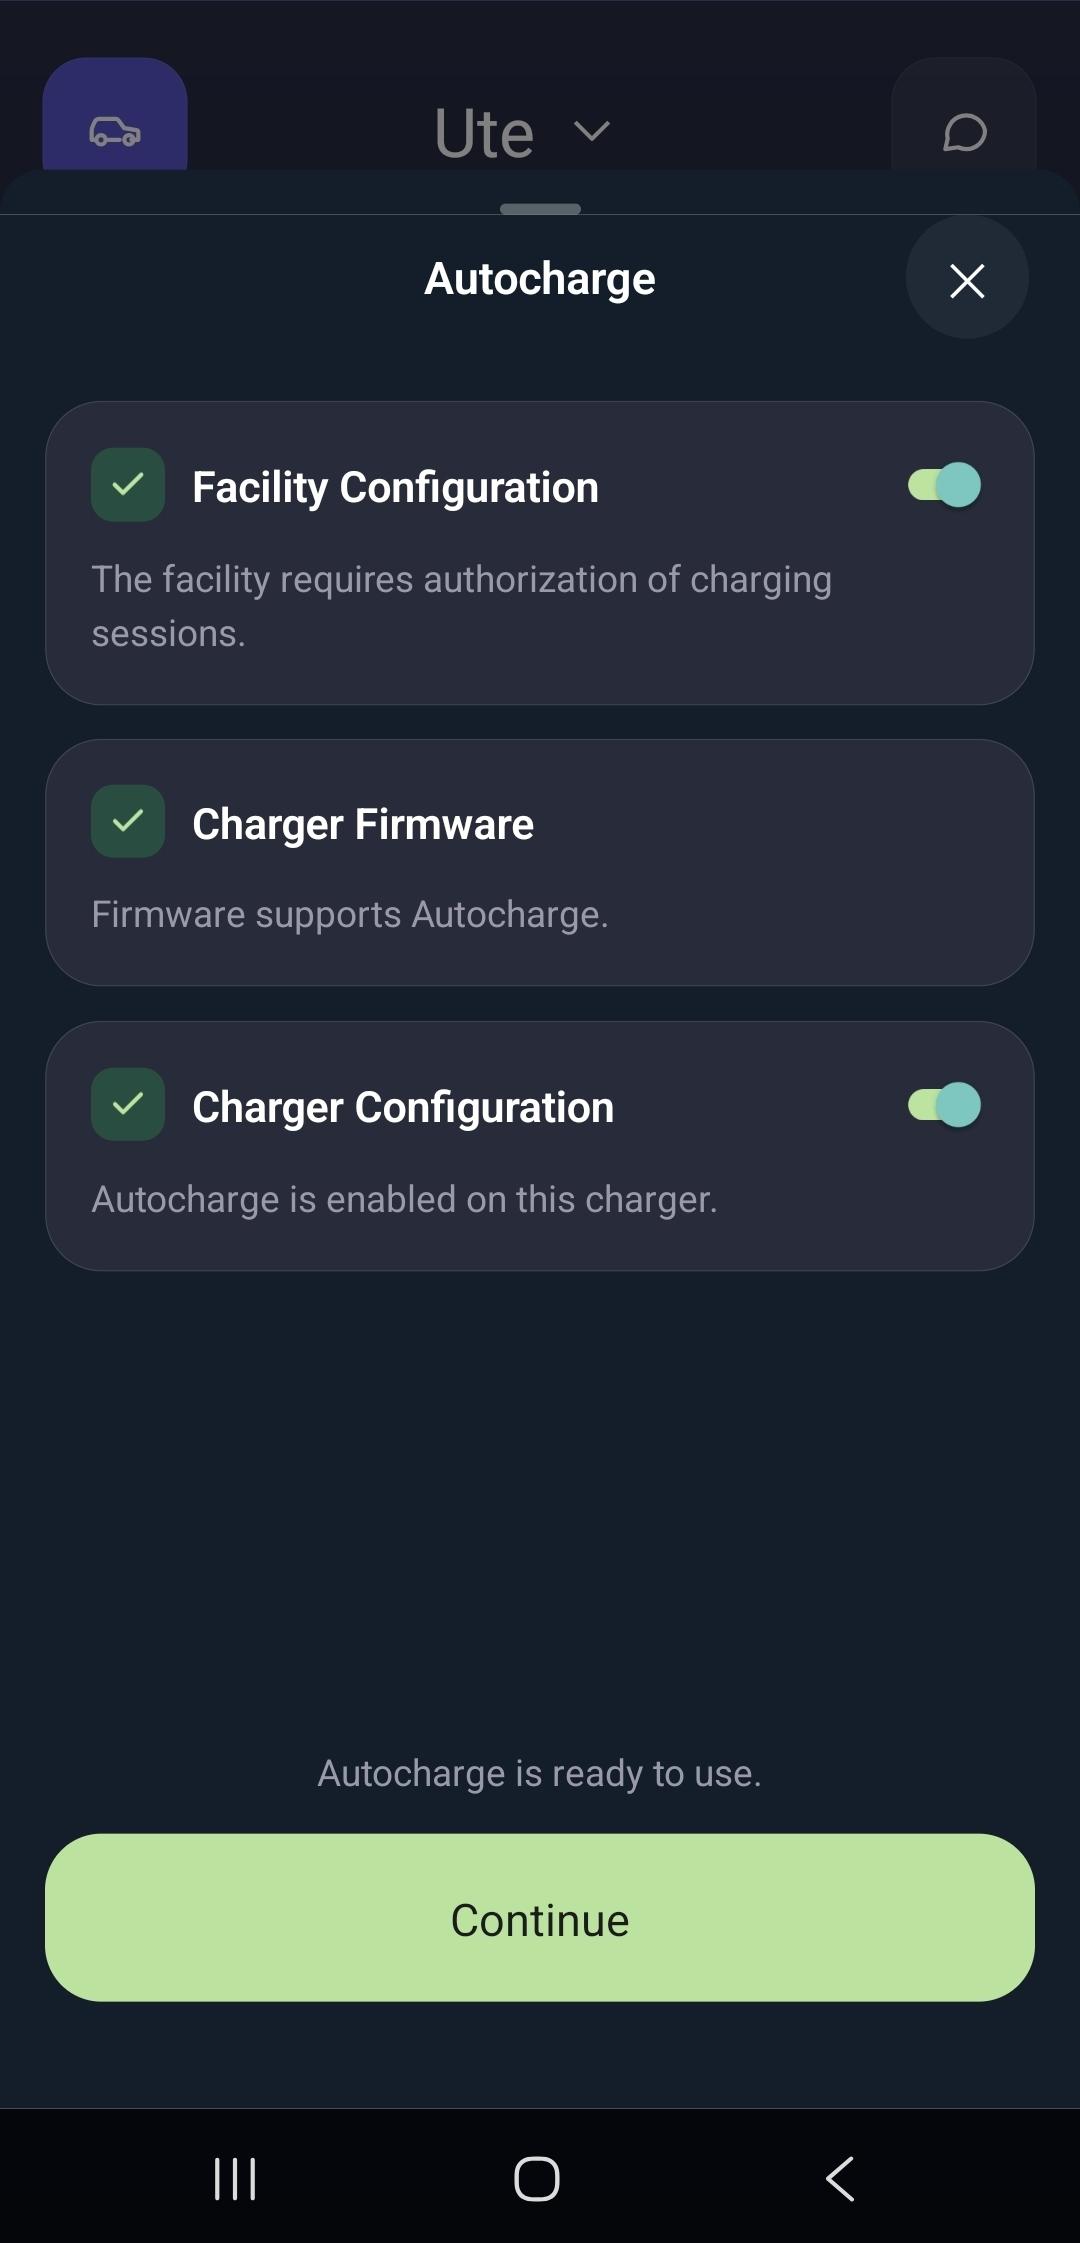
Open the settings (the gear icon) to confirm your charger is ready. Three conditions must each show a green check:
- Facility configuration — the facility requires authorization of sessions.
- Charger firmware — the firmware supports Autocharge.
- Charger configuration — Autocharge is enabled on this charger.
When all three are green you'll see Autocharge is ready to use. Tap Continue.
Note
If any condition isn't met, Autocharge can't be activated yet. Firmware and charger configuration update automatically when the charger is online; if the facility doesn't require authorization, there's nothing to automate. Reach out through the in-app chat if a condition stays unmet.
2. Register your vehicle
You register a car by plugging it in once so the charger can capture its identity.
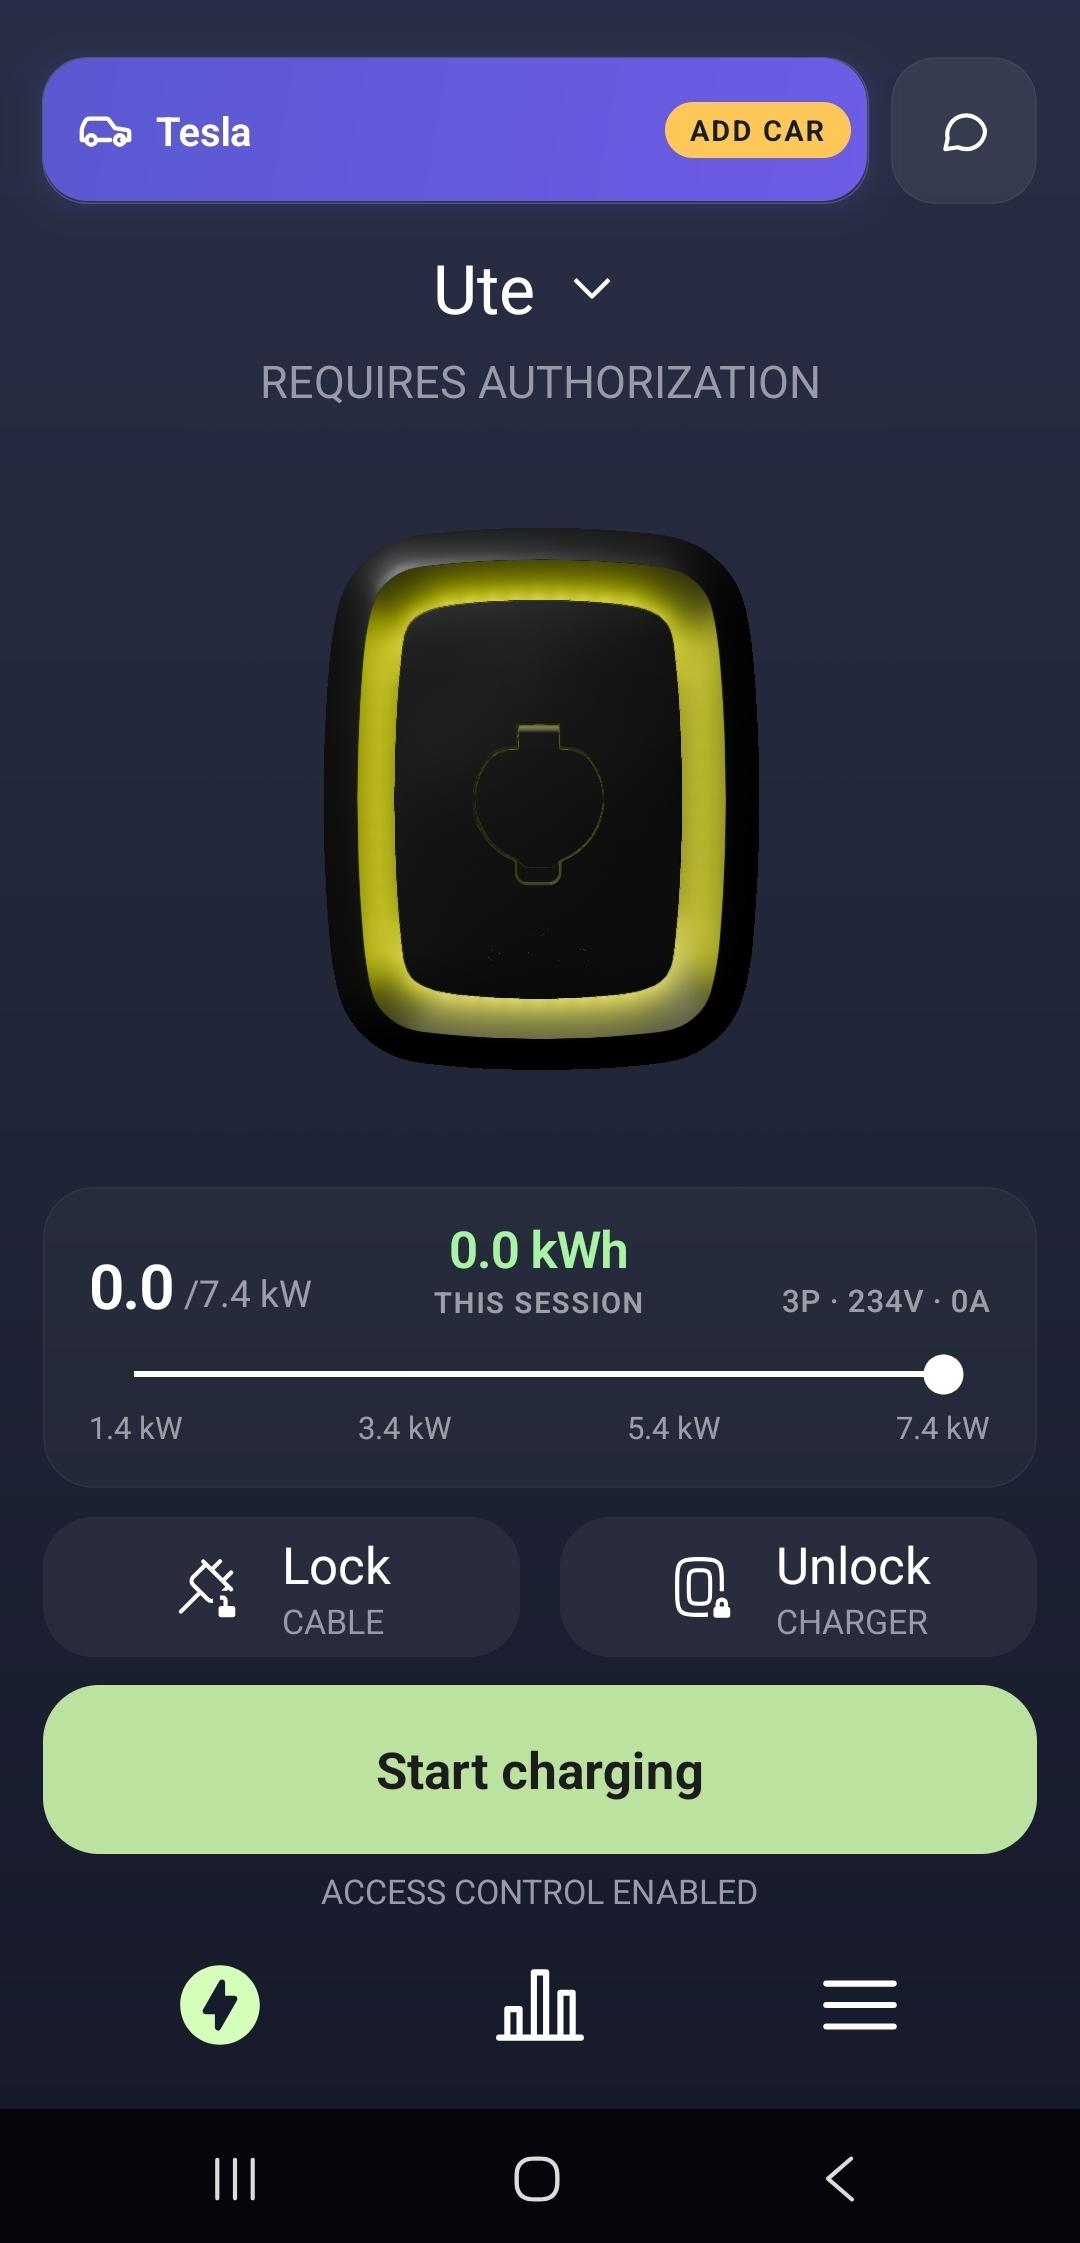
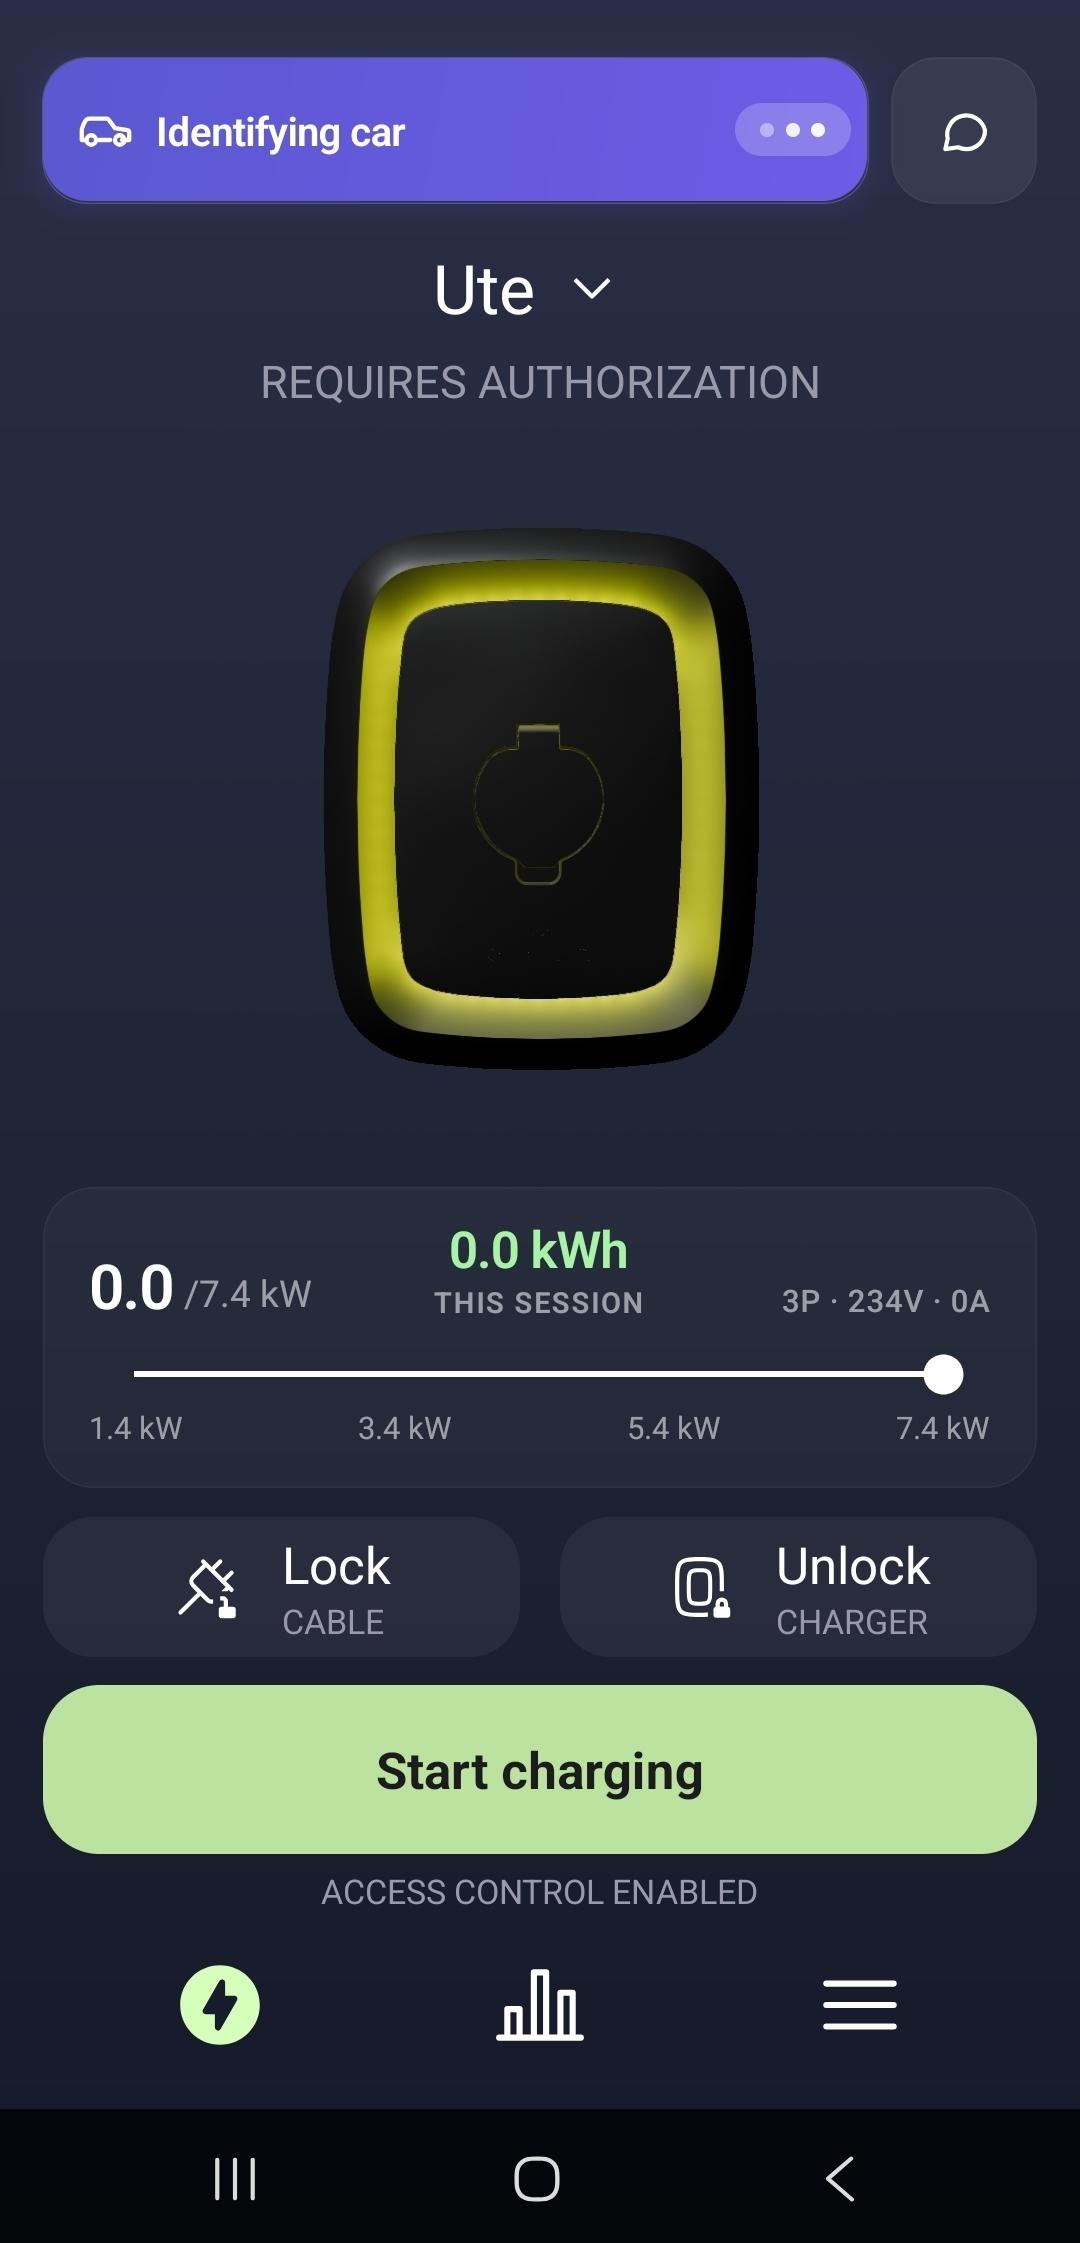
Plug the car into the charger. The ring turns yellow, the status shows Requires authorization, and the app shows Identifying car while it reads the vehicle.

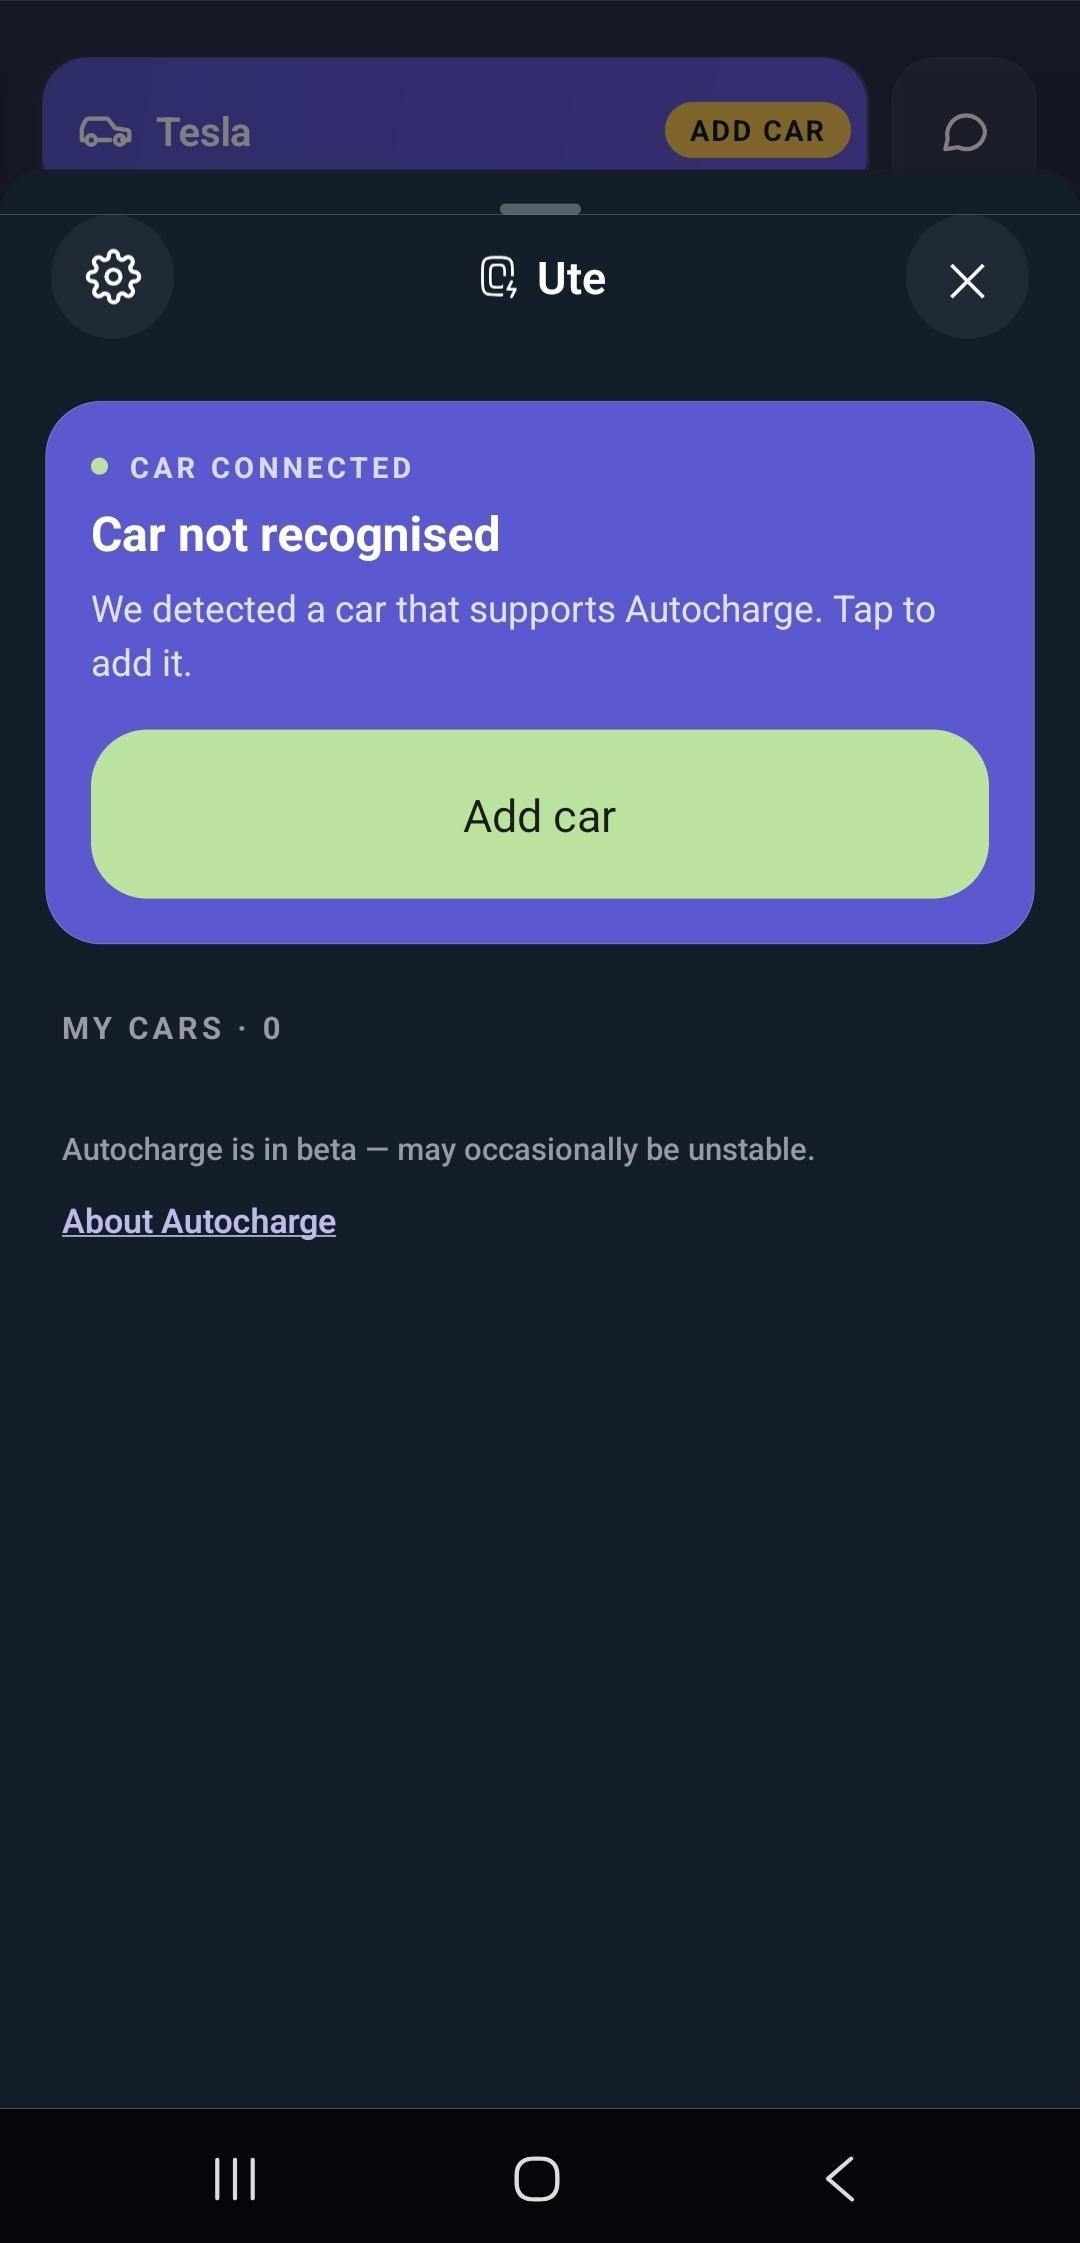
If your car supports Autocharge, the charger identifies it — here, a Tesla — and an Add car button appears in the vehicle chip at the top. This prompt only shows for vehicles that support Autocharge. Tap Add car.
The Autocharge panel opens and shows Car not recognised — it's detected but not registered yet. Tap Add car to continue.
Enter the car's details — make, model, and year. Add an optional nickname to tell cars apart, then tap Save and activate Autocharge.

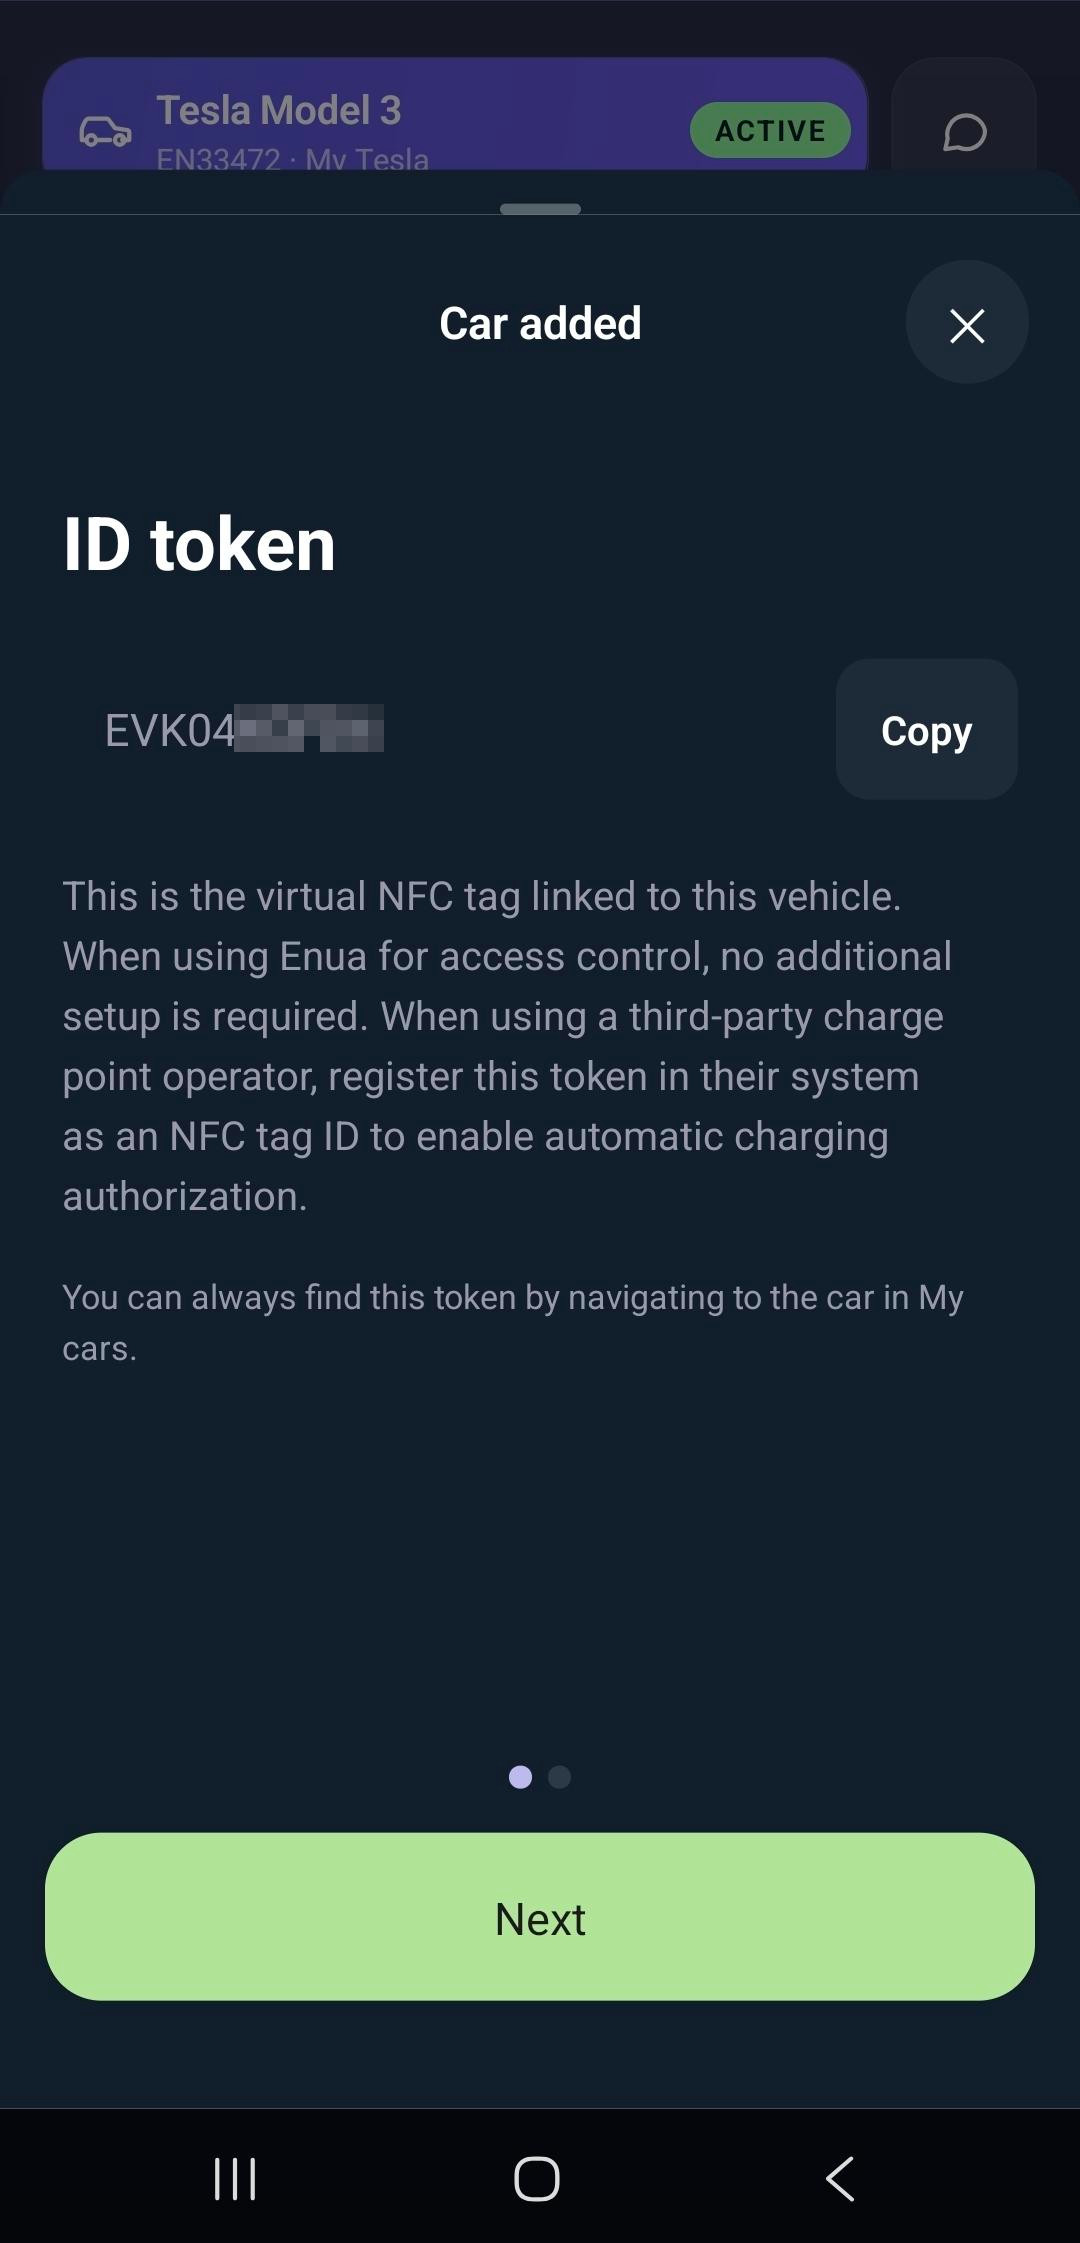
The car is added and you're shown its ID token — a virtual NFC tag linked to the vehicle. With Enua access control, no further setup is needed. If you charge with a third-party operator, register this token in their system as an NFC tag ID. You can always find it again under the car in My cars. Tap Next.
Warning
Charging through a third-party charge point operator (CPO)? When Autocharge starts a session, Enua sends the car's virtual NFC tag (the ID token) to the CPO to identify your vehicle. The CPO only accepts tags that are registered in its app — so if this token isn't registered there, the CPO will reject it and authorization will fail: the car won't start charging. Copy the ID token and register it in your CPO app as an NFC tag ID before charging. This doesn't apply when you use Enua for access control.
The app then asks you to reconnect your car — disconnect and plug in again to test Autocharge. Tap Continue.

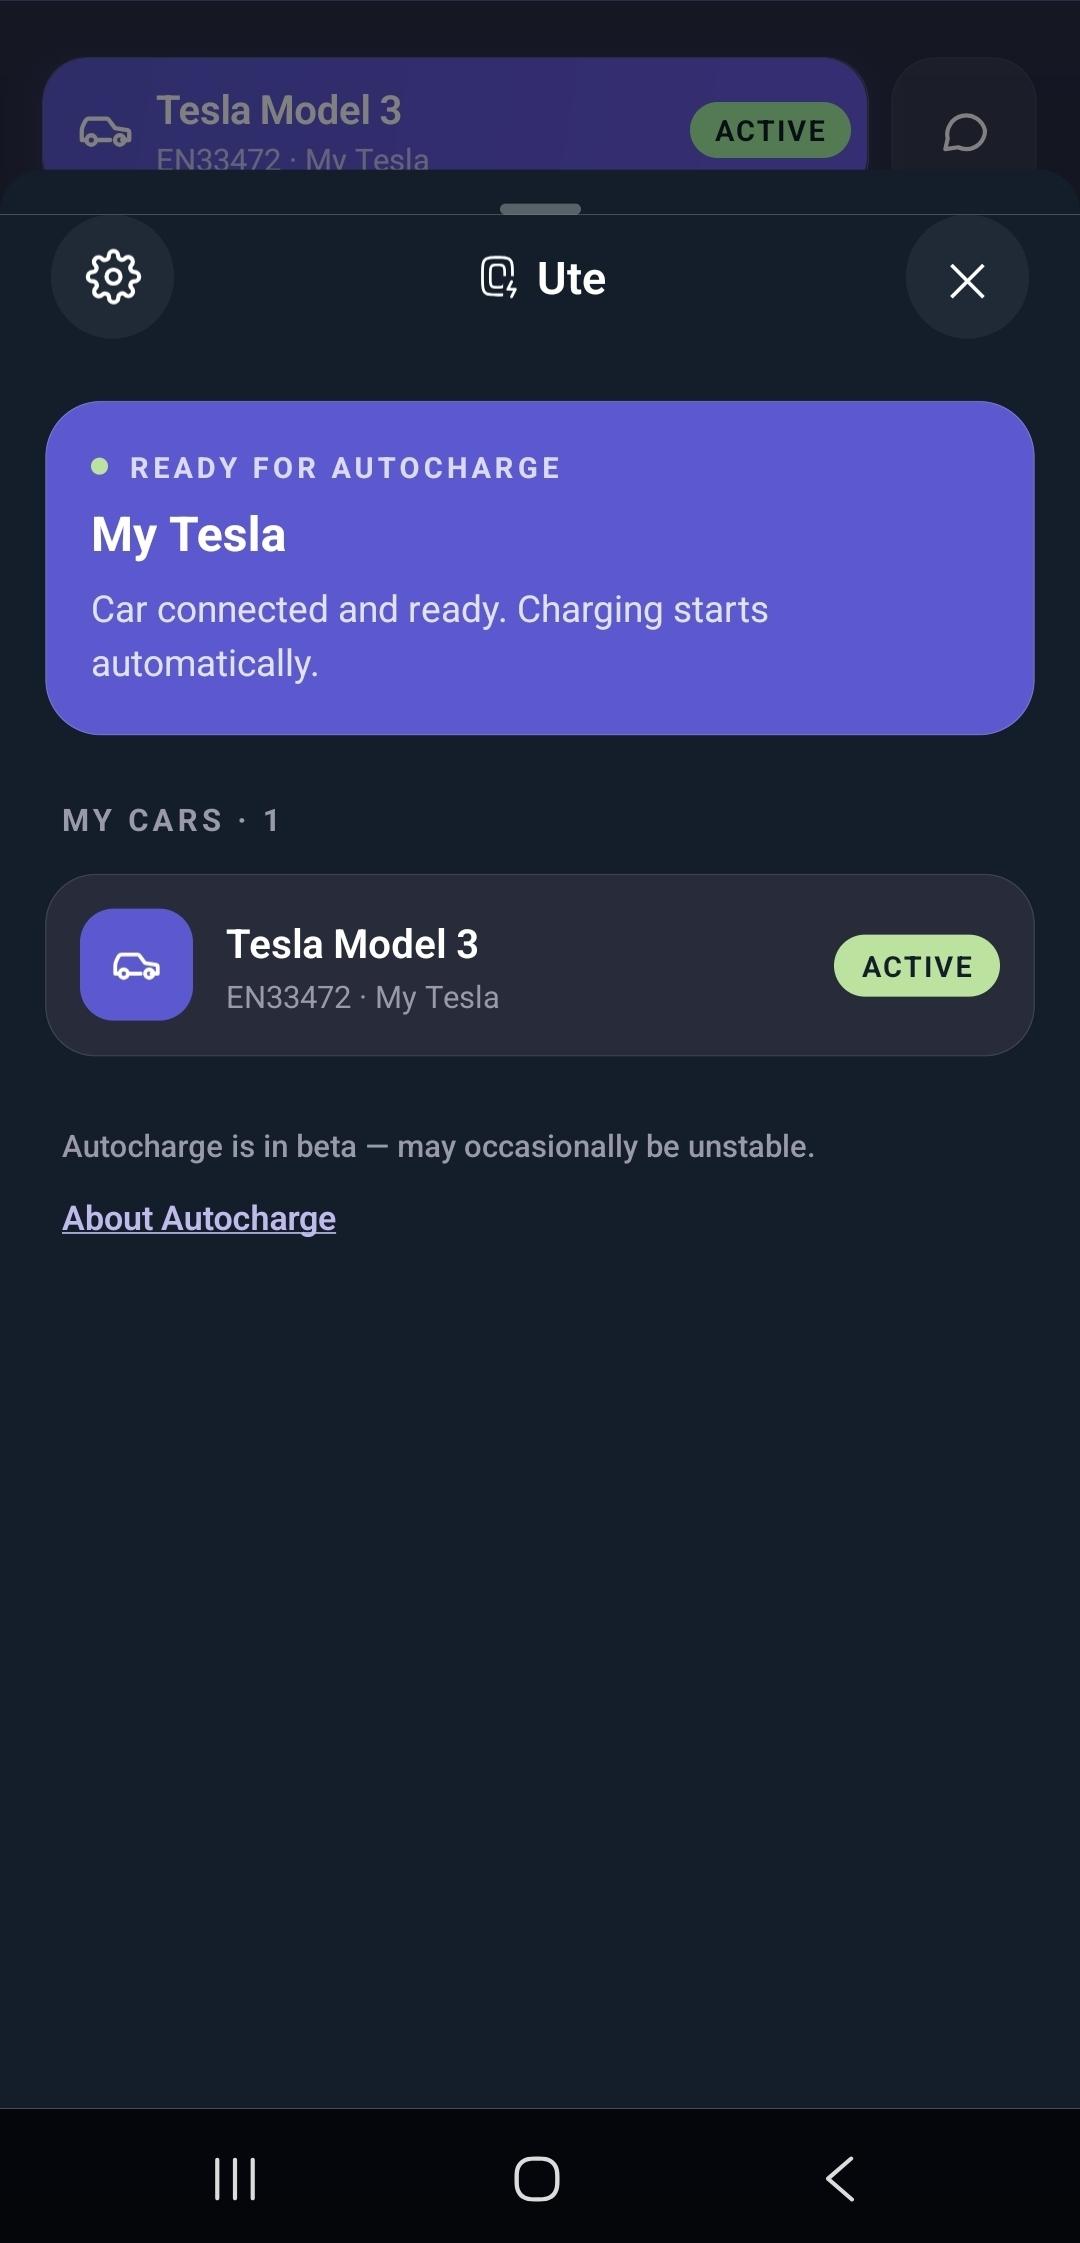
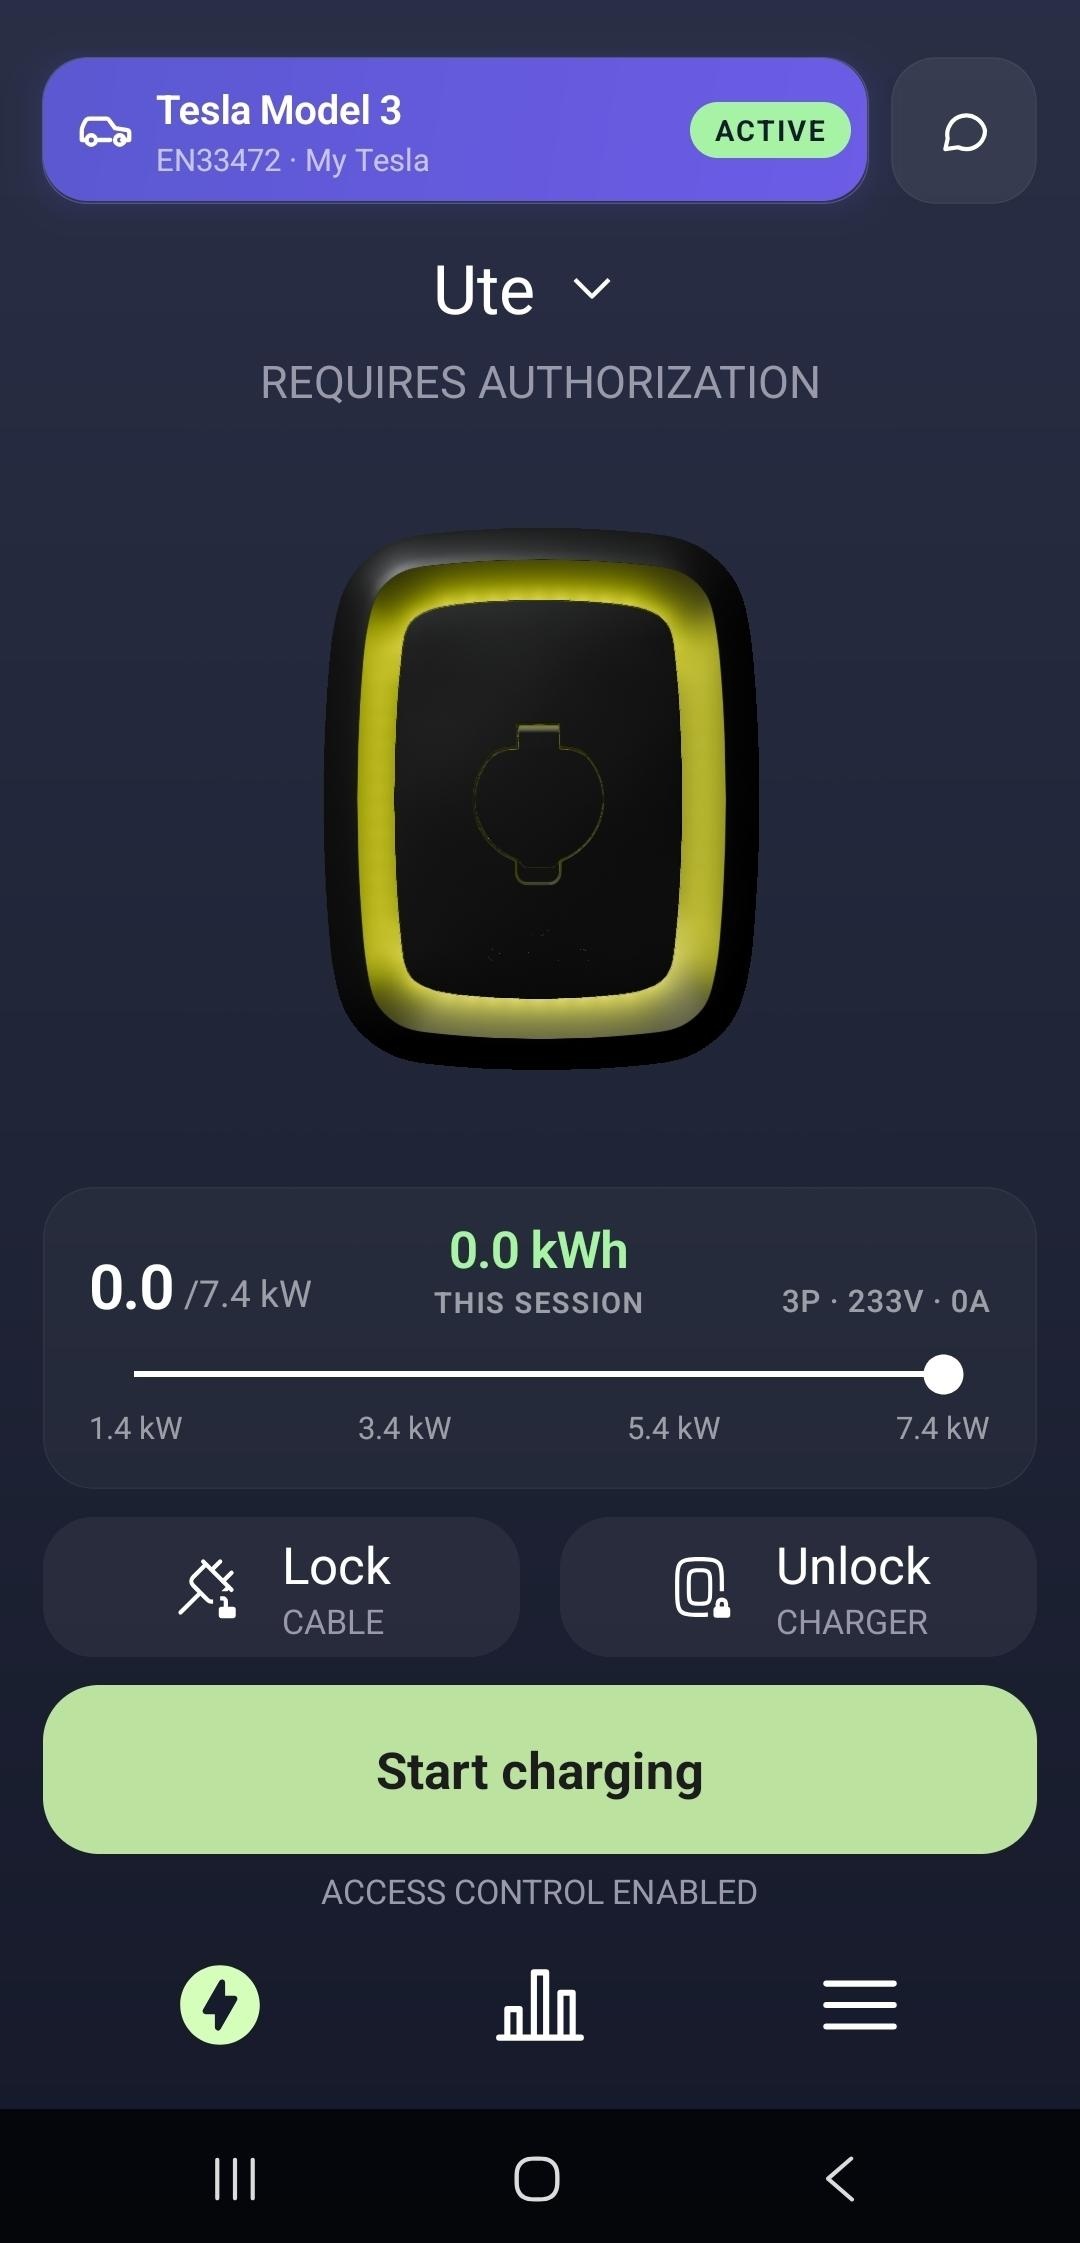
After reconnecting, the panel shows Ready for Autocharge and the car is listed as Active under My cars. Charging now starts automatically whenever this car is plugged in.
3. Start charging
Once your car is registered, starting a charge takes no extra steps.
Plug in. The ring turns yellow and shows Requires authorization while the charger identifies the car.
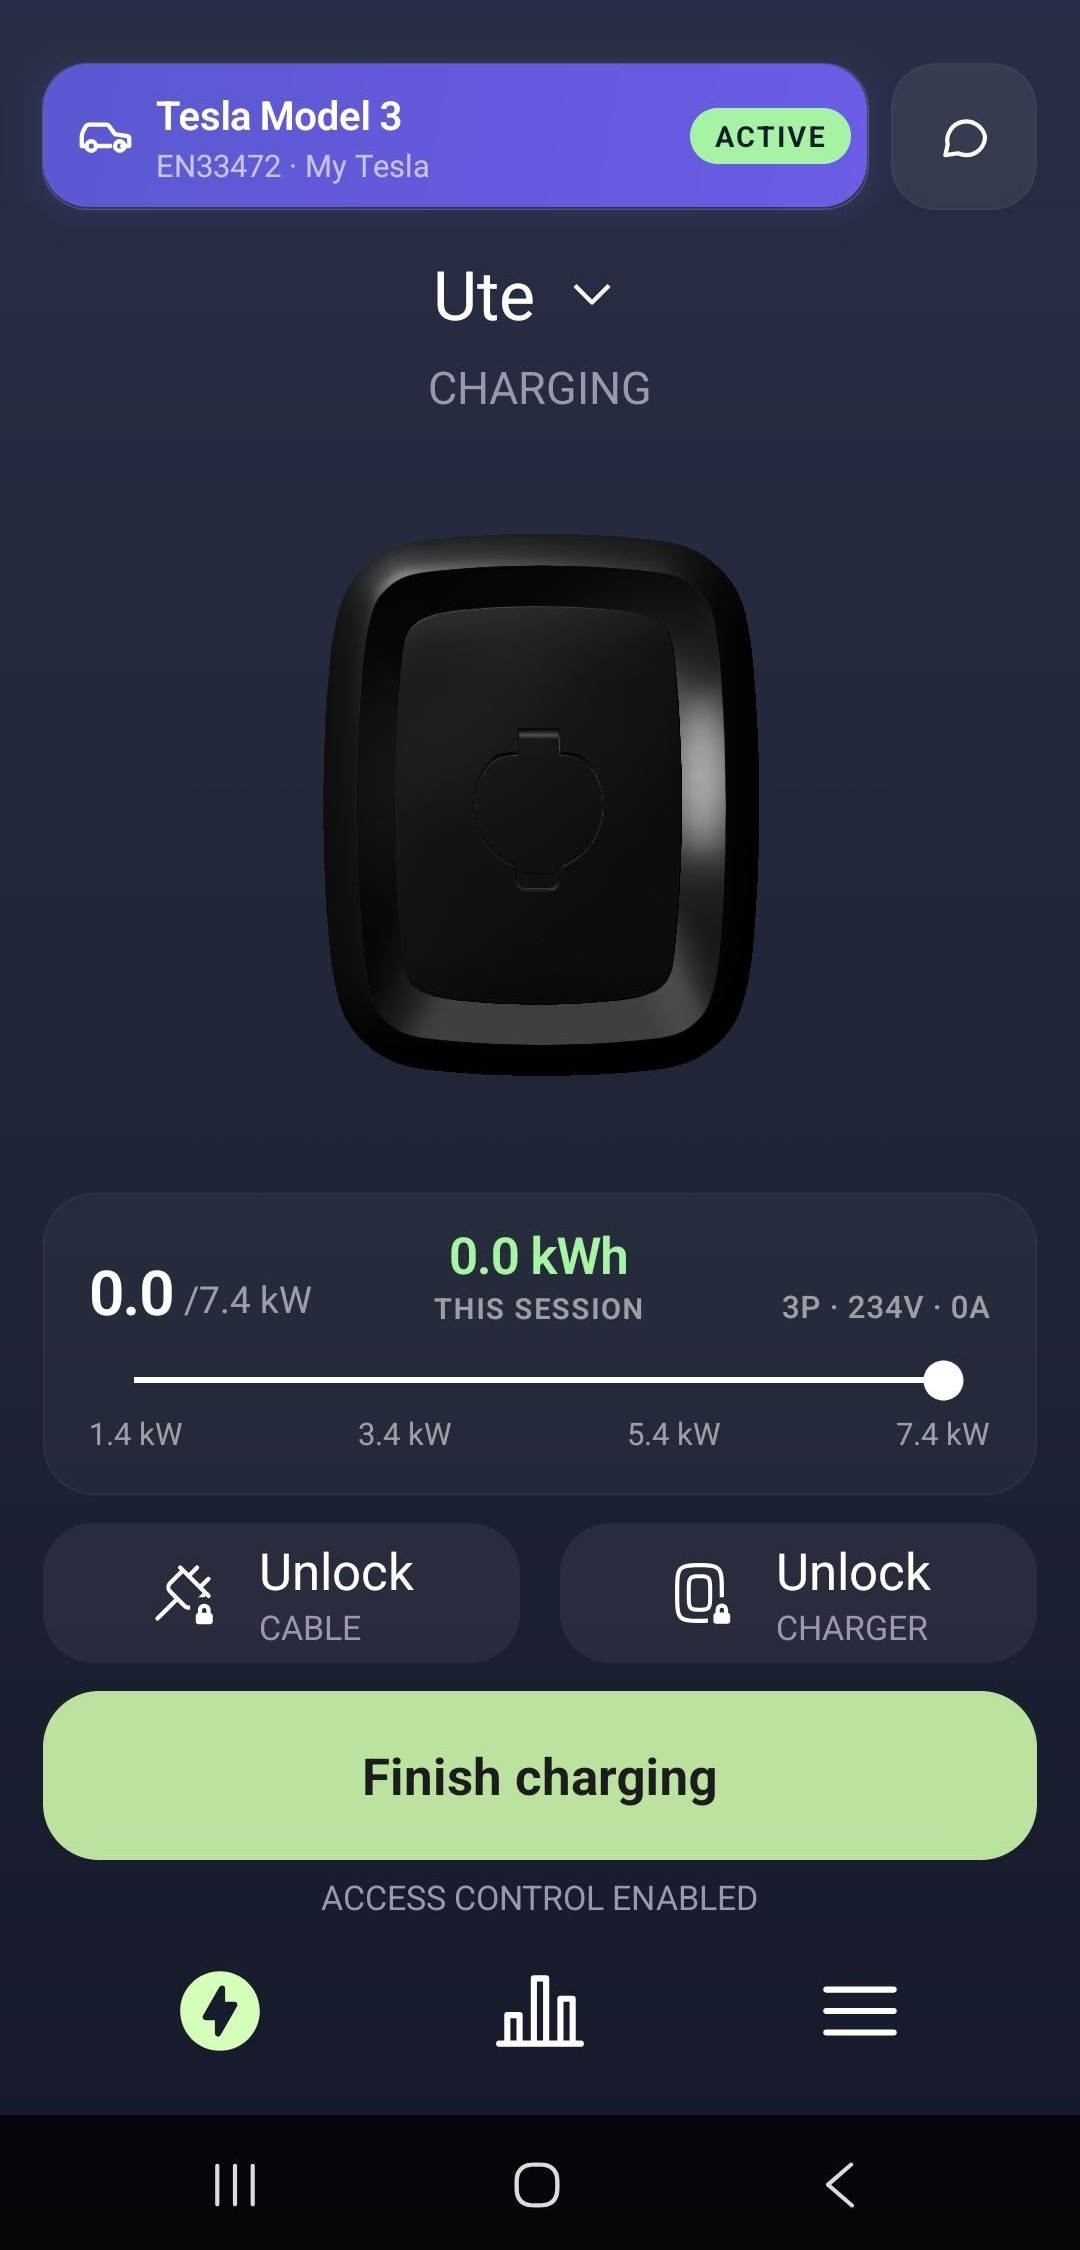
The car is recognised. The registered car (here, the Tesla Model 3) appears as Active — Autocharge authorizes the session for you.
Charging starts. The status changes to Charging, and you can end the session any time with Finish charging.
Tip
If the car isn't recognised on a particular session (it can happen while Autocharge is in beta), just authorize the session the usual way — tap Start charging in the app or present your RFID tag. Your registration stays intact for next time.
Related
- Access control — RFID tags, the Enua app, and who can start a session.
- What the lights mean — including the yellow "requires authorization" ring.